Cloudinary integration for Uniform Mesh
Transform images and videos to load faster with no visual degradation, automatically generate image and video variants, and deliver high-quality, responsive experiences to increase conversions. Learn more at Cloudinary.com
This integration allows business users to connect images and videos from the Cloudinary DAM to a component in Uniform, making it easy to connect different sources.
Pre-requisites
- A Cloudinary account with you as the admin.
- Uniform account with at least one project. Signup for free here.
Step 1: Install and configure the integration
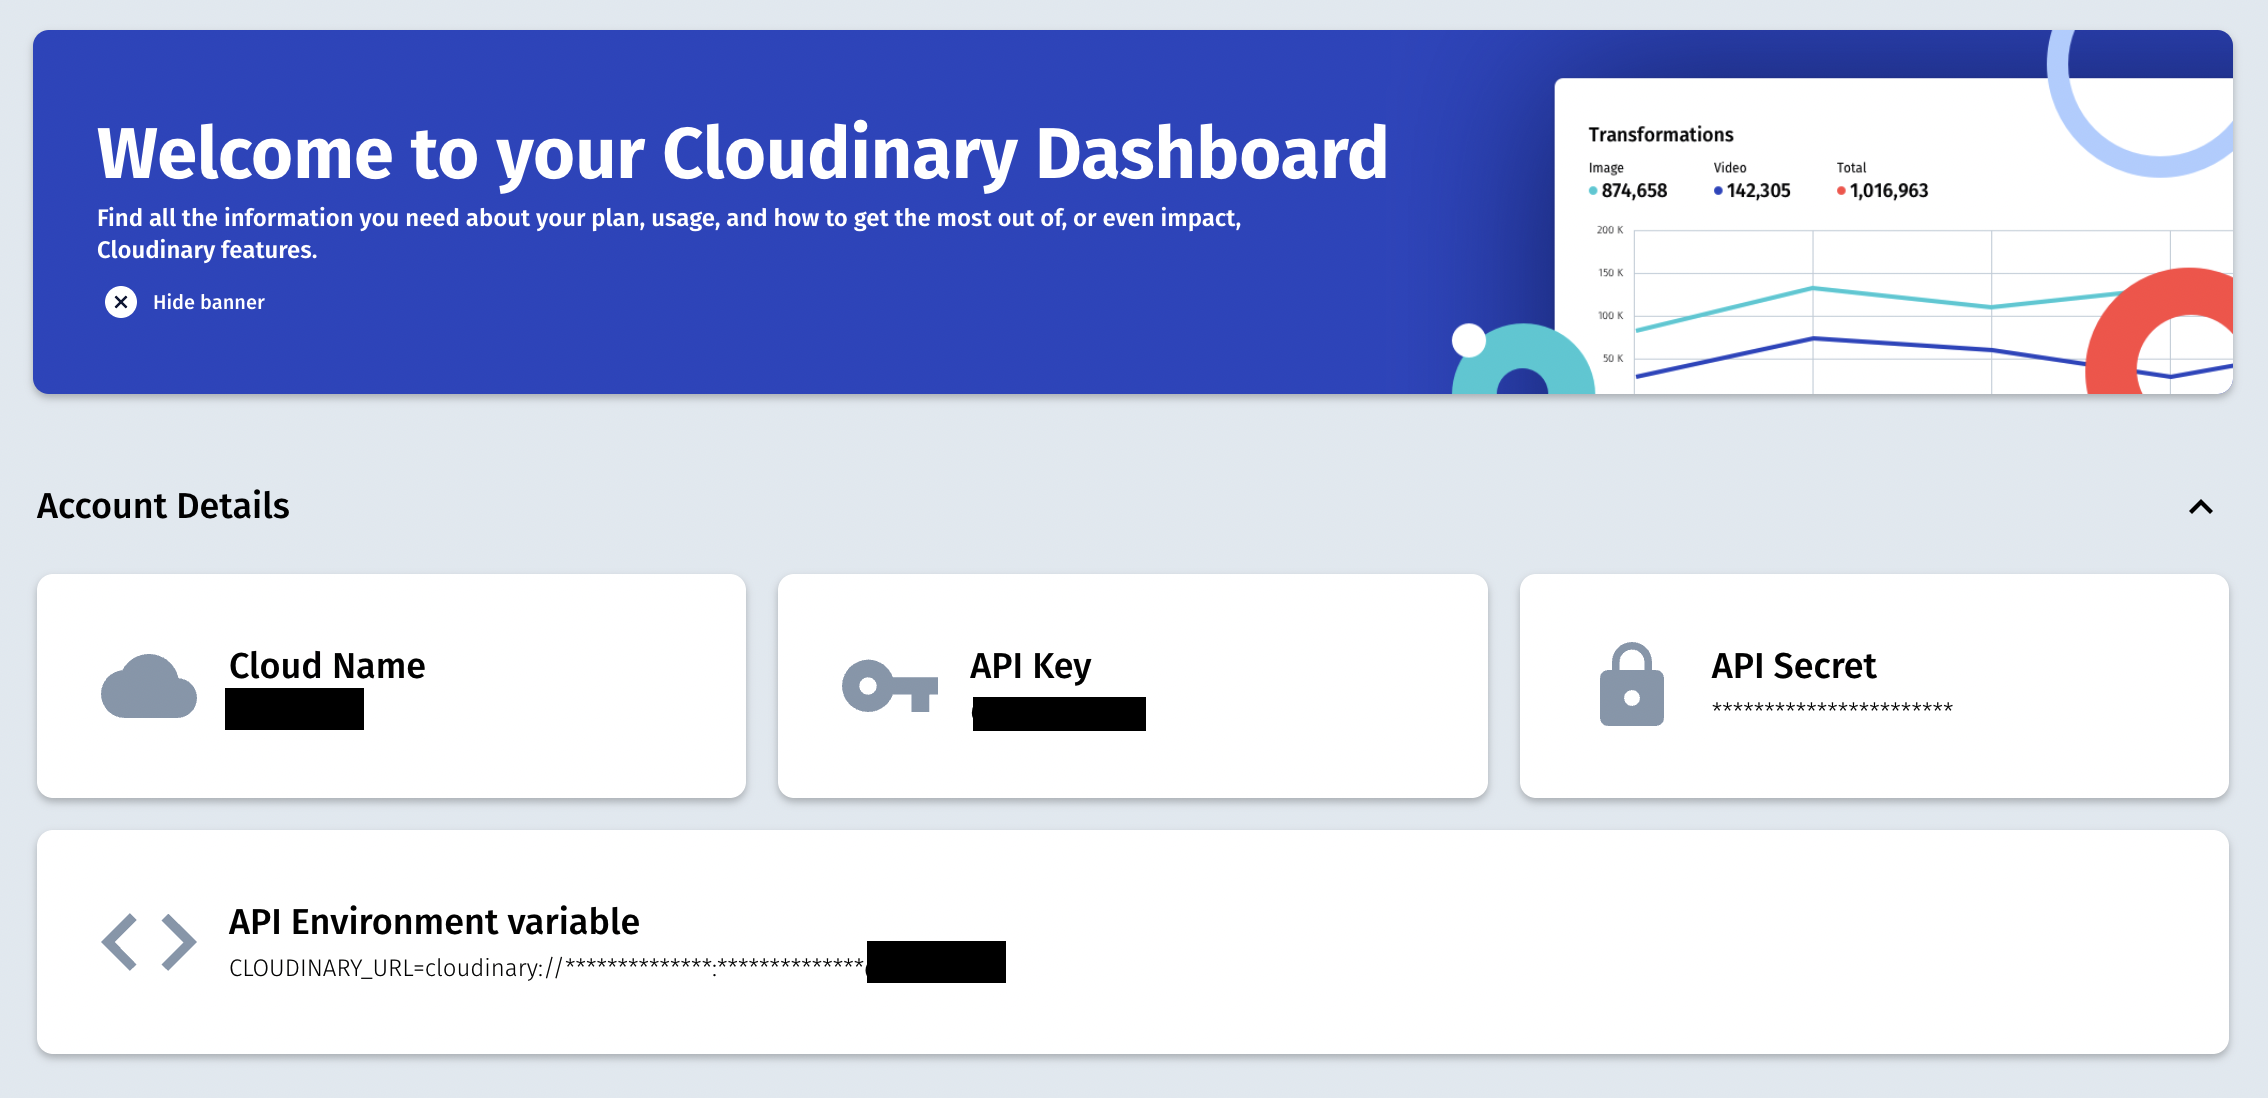
- Before installing the extension, find the
cloudnameand theAPI key. You can find this information in the Cloudinary dashboard. See the screenshot below.
info
Note that the API secret is not needed as end-users will log into your cloud instance when they use the Cloudinary extension in Uniform.
important
Suppose Cloudinary media assets have been connected to a Uniform component, and the user is not logged in. In that case, they can still see the connected assets. They cannot add new assets unless they log in via the Cloudinary widget.
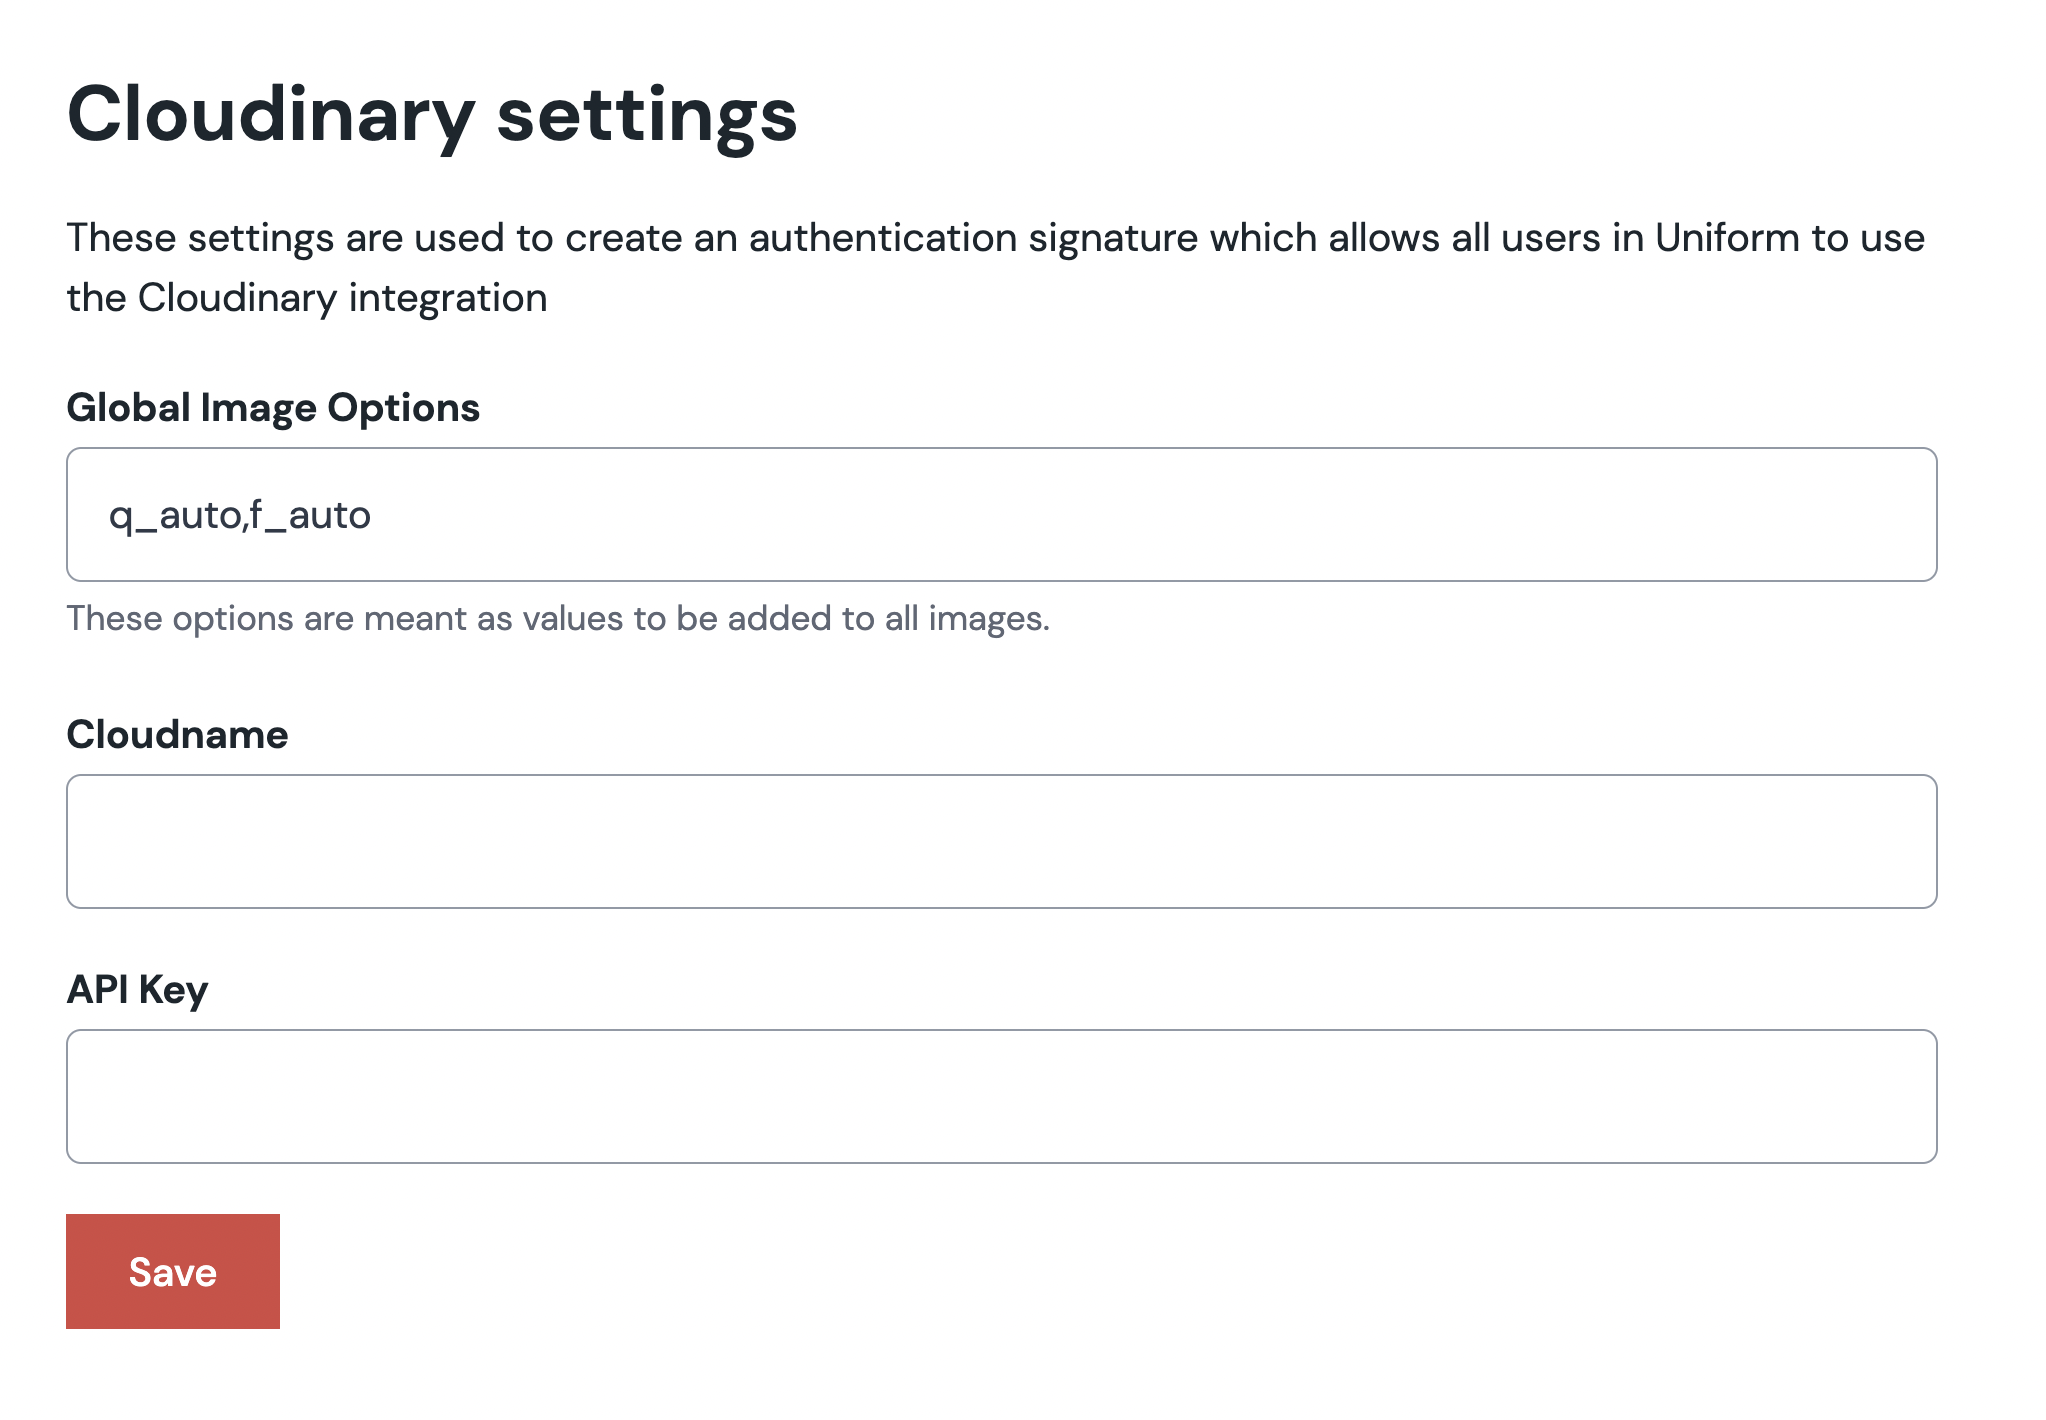
- Fill out the configuration form in Uniform with the
cloudnameand theAPI key. - Notice that there is also a
Global Image Optionsfield. Anything you fill out in this field is appended to the URLs Cloudinary generates when serving assets. A great default isq_auto,f_auto. This setting uses AI to select the right image quality and the most optimal file type for your browser.
Step 2: Create a component parameter
In the component parameter, you can set specific rules for the media selected for that particular component. These rules allow you to add different settings for media asset delivery per component in a Uniform composition.
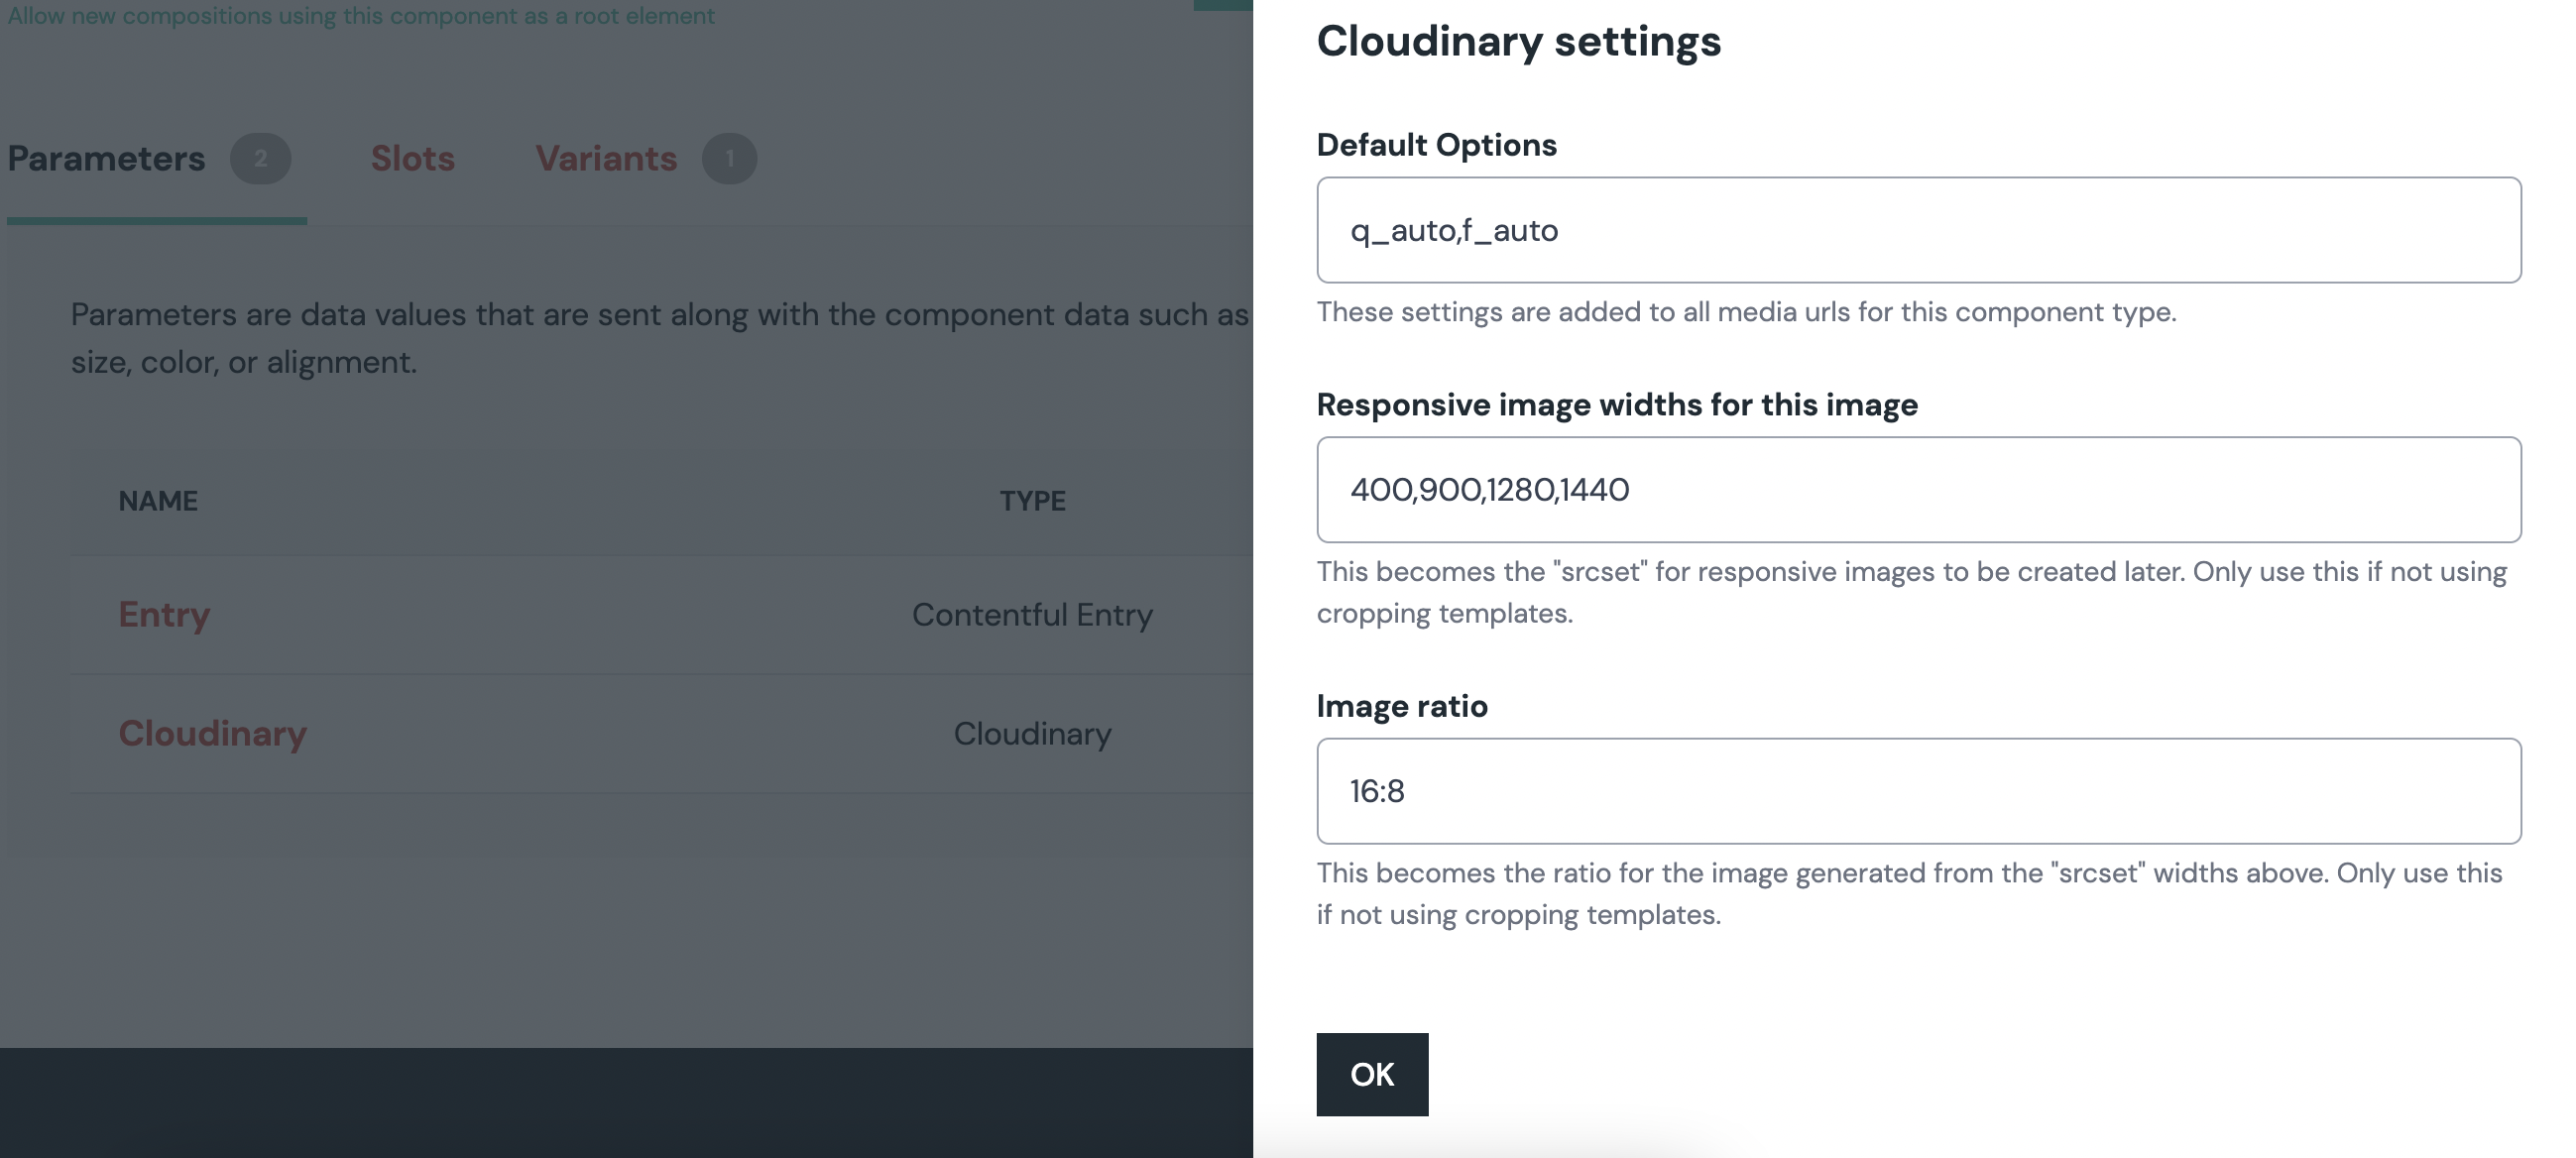
- Default options This setting is similar to the
Global Image Optionsfield in the general settings of the Cloudinary Mesh Integration. If this field is filled out, it will overrule the global image options for all images served within this specific component. An example could be to force the use of a png filetype (f_png) or a higher quality setting (q_auto:best). Another option could be if you always want to crop to a face in this component, add something like:c_crop,g_face. Any Cloudinary URL API variable can be added here. - Responsive image widths This setting allows you to add a comma-seperated list of the widths you want your image to have in the
srcsetof the responsive image tag. Leave empty if you are not using responsive images. - Image ratio This setting allows you to set an image ratio like
16:9or1:1. This way, you control the image ratio combined with the image widths supplied in the image's previoussrcsetattribute. Leave empty if not needed for your specific implementation.
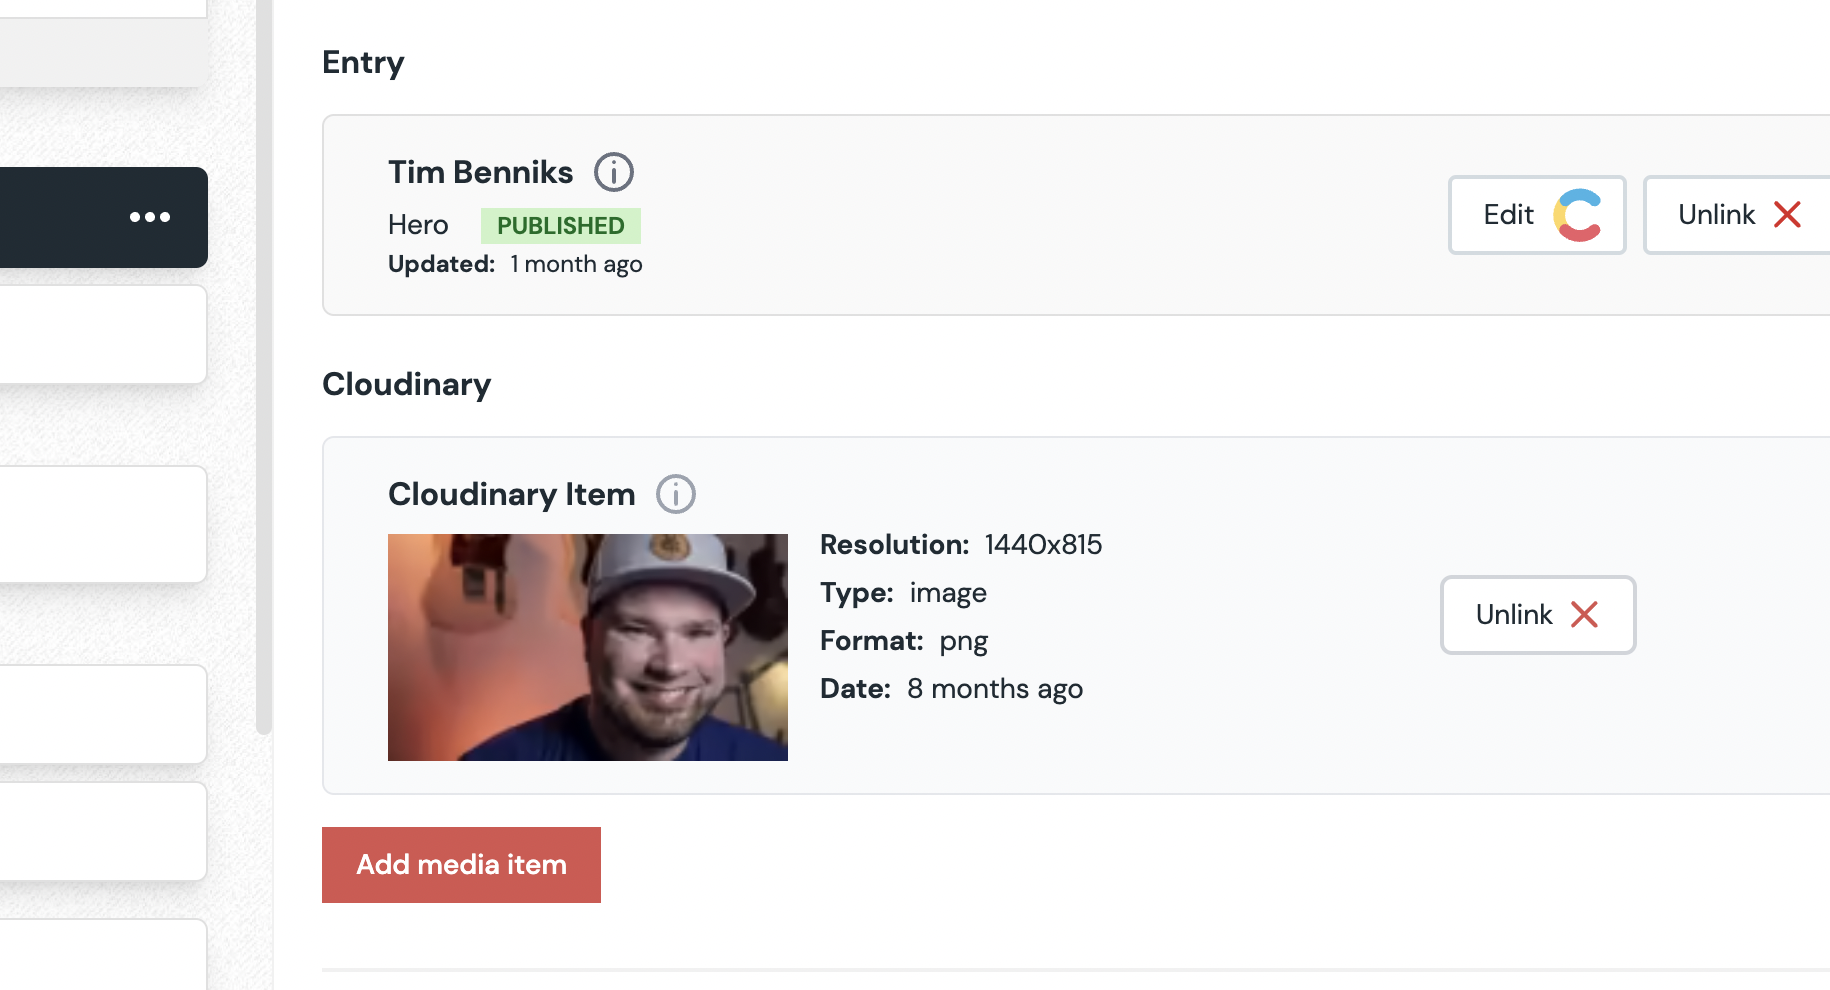
Add an asset to a composition
You can start adding media to your components after the setup.
Select a media item by clicking the button.
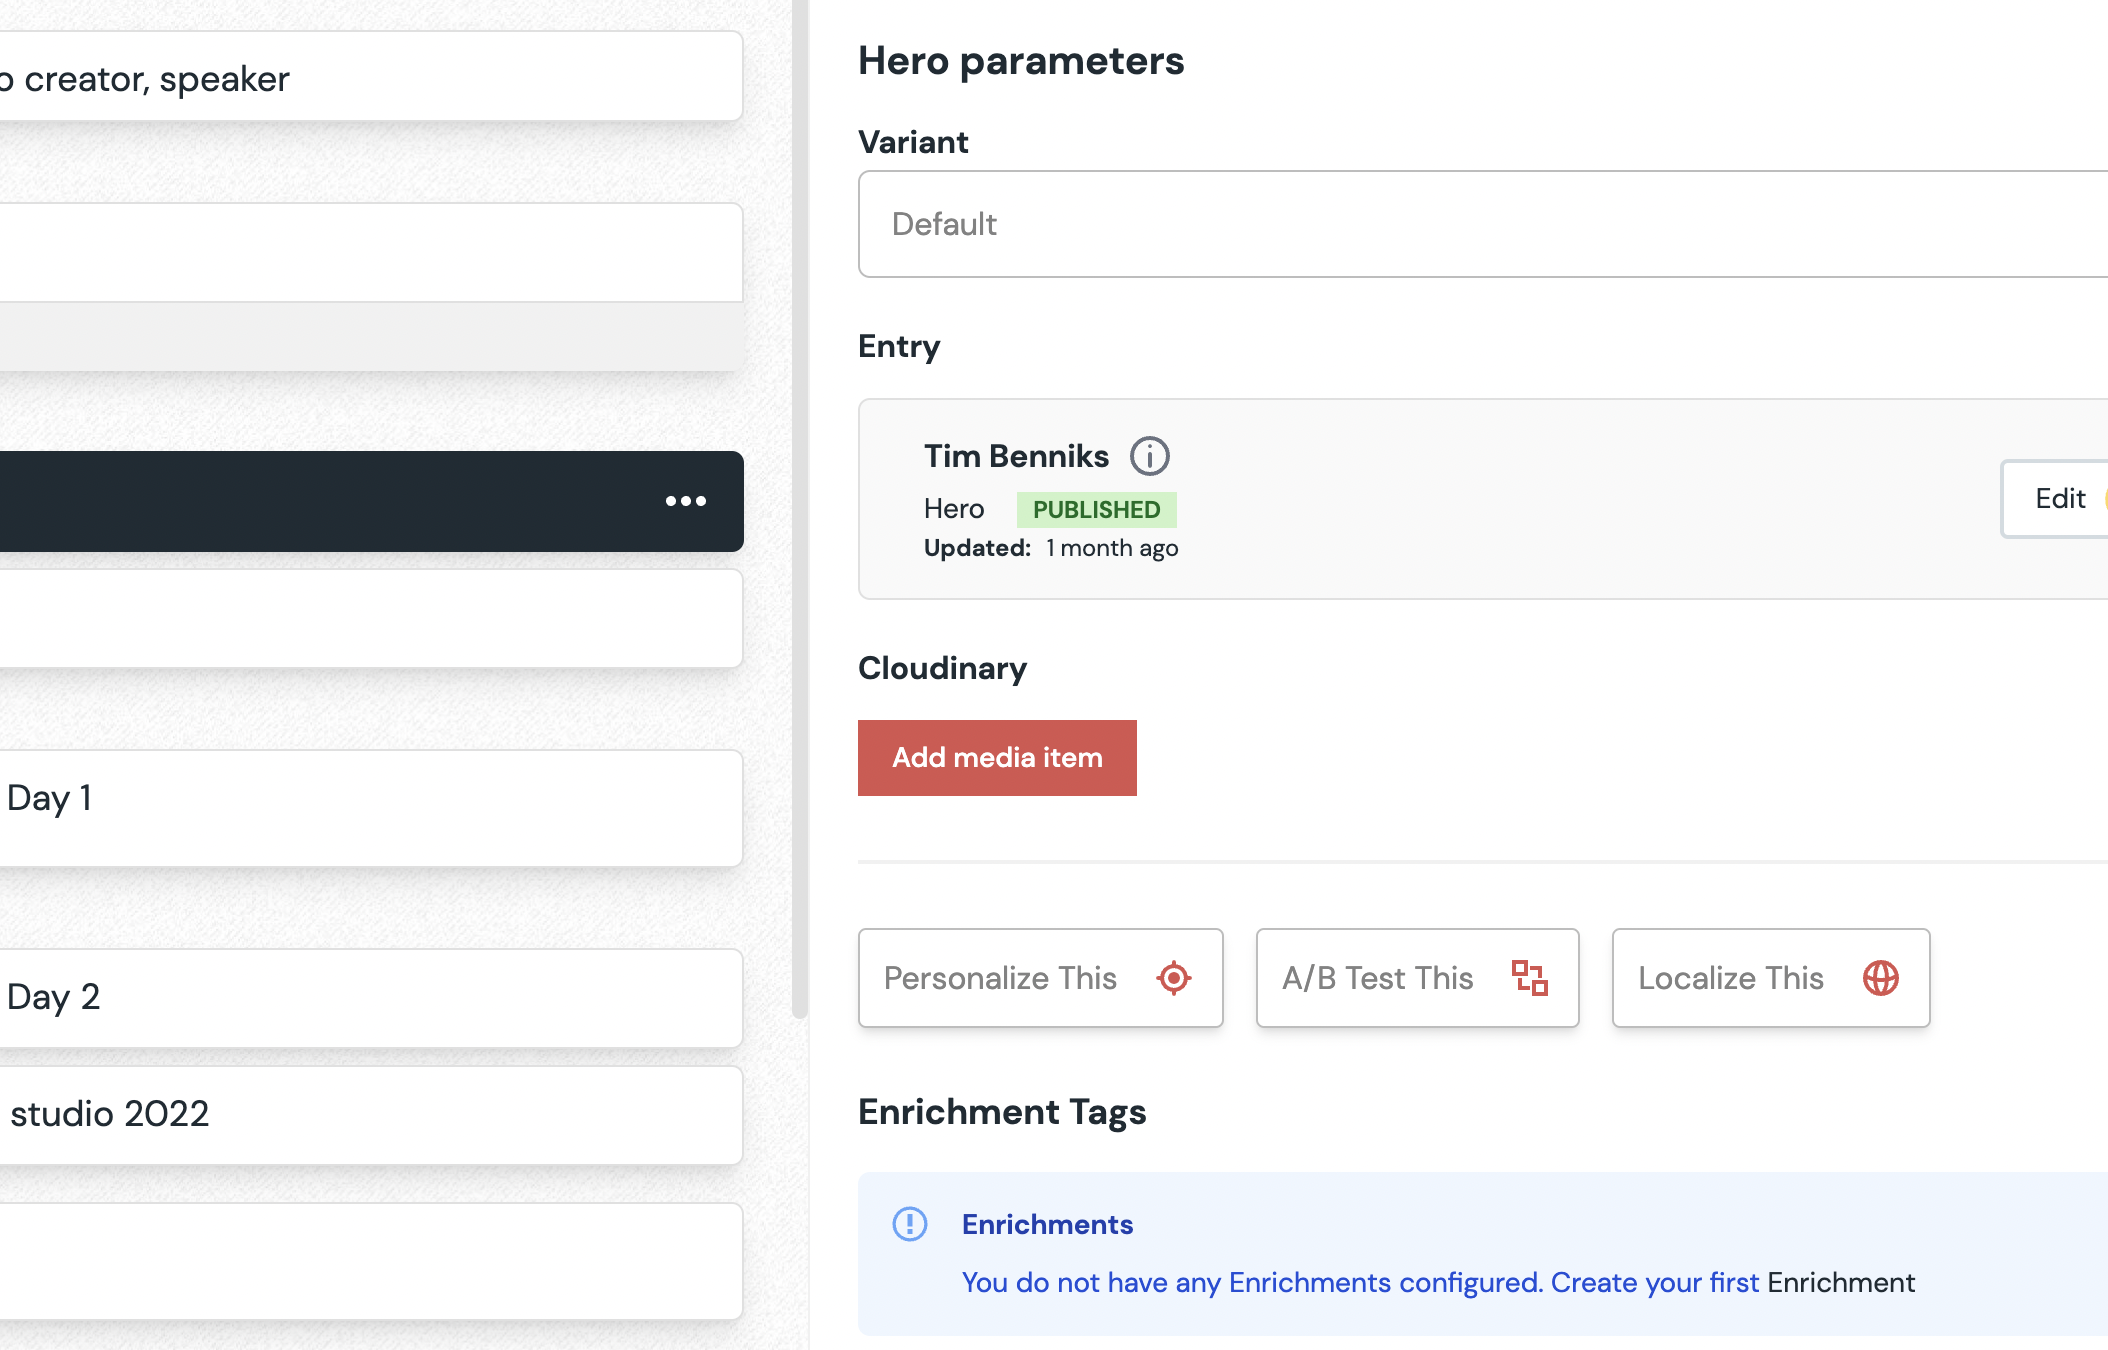
If needed, log in to Cloudinary and select your asset. Click insert.
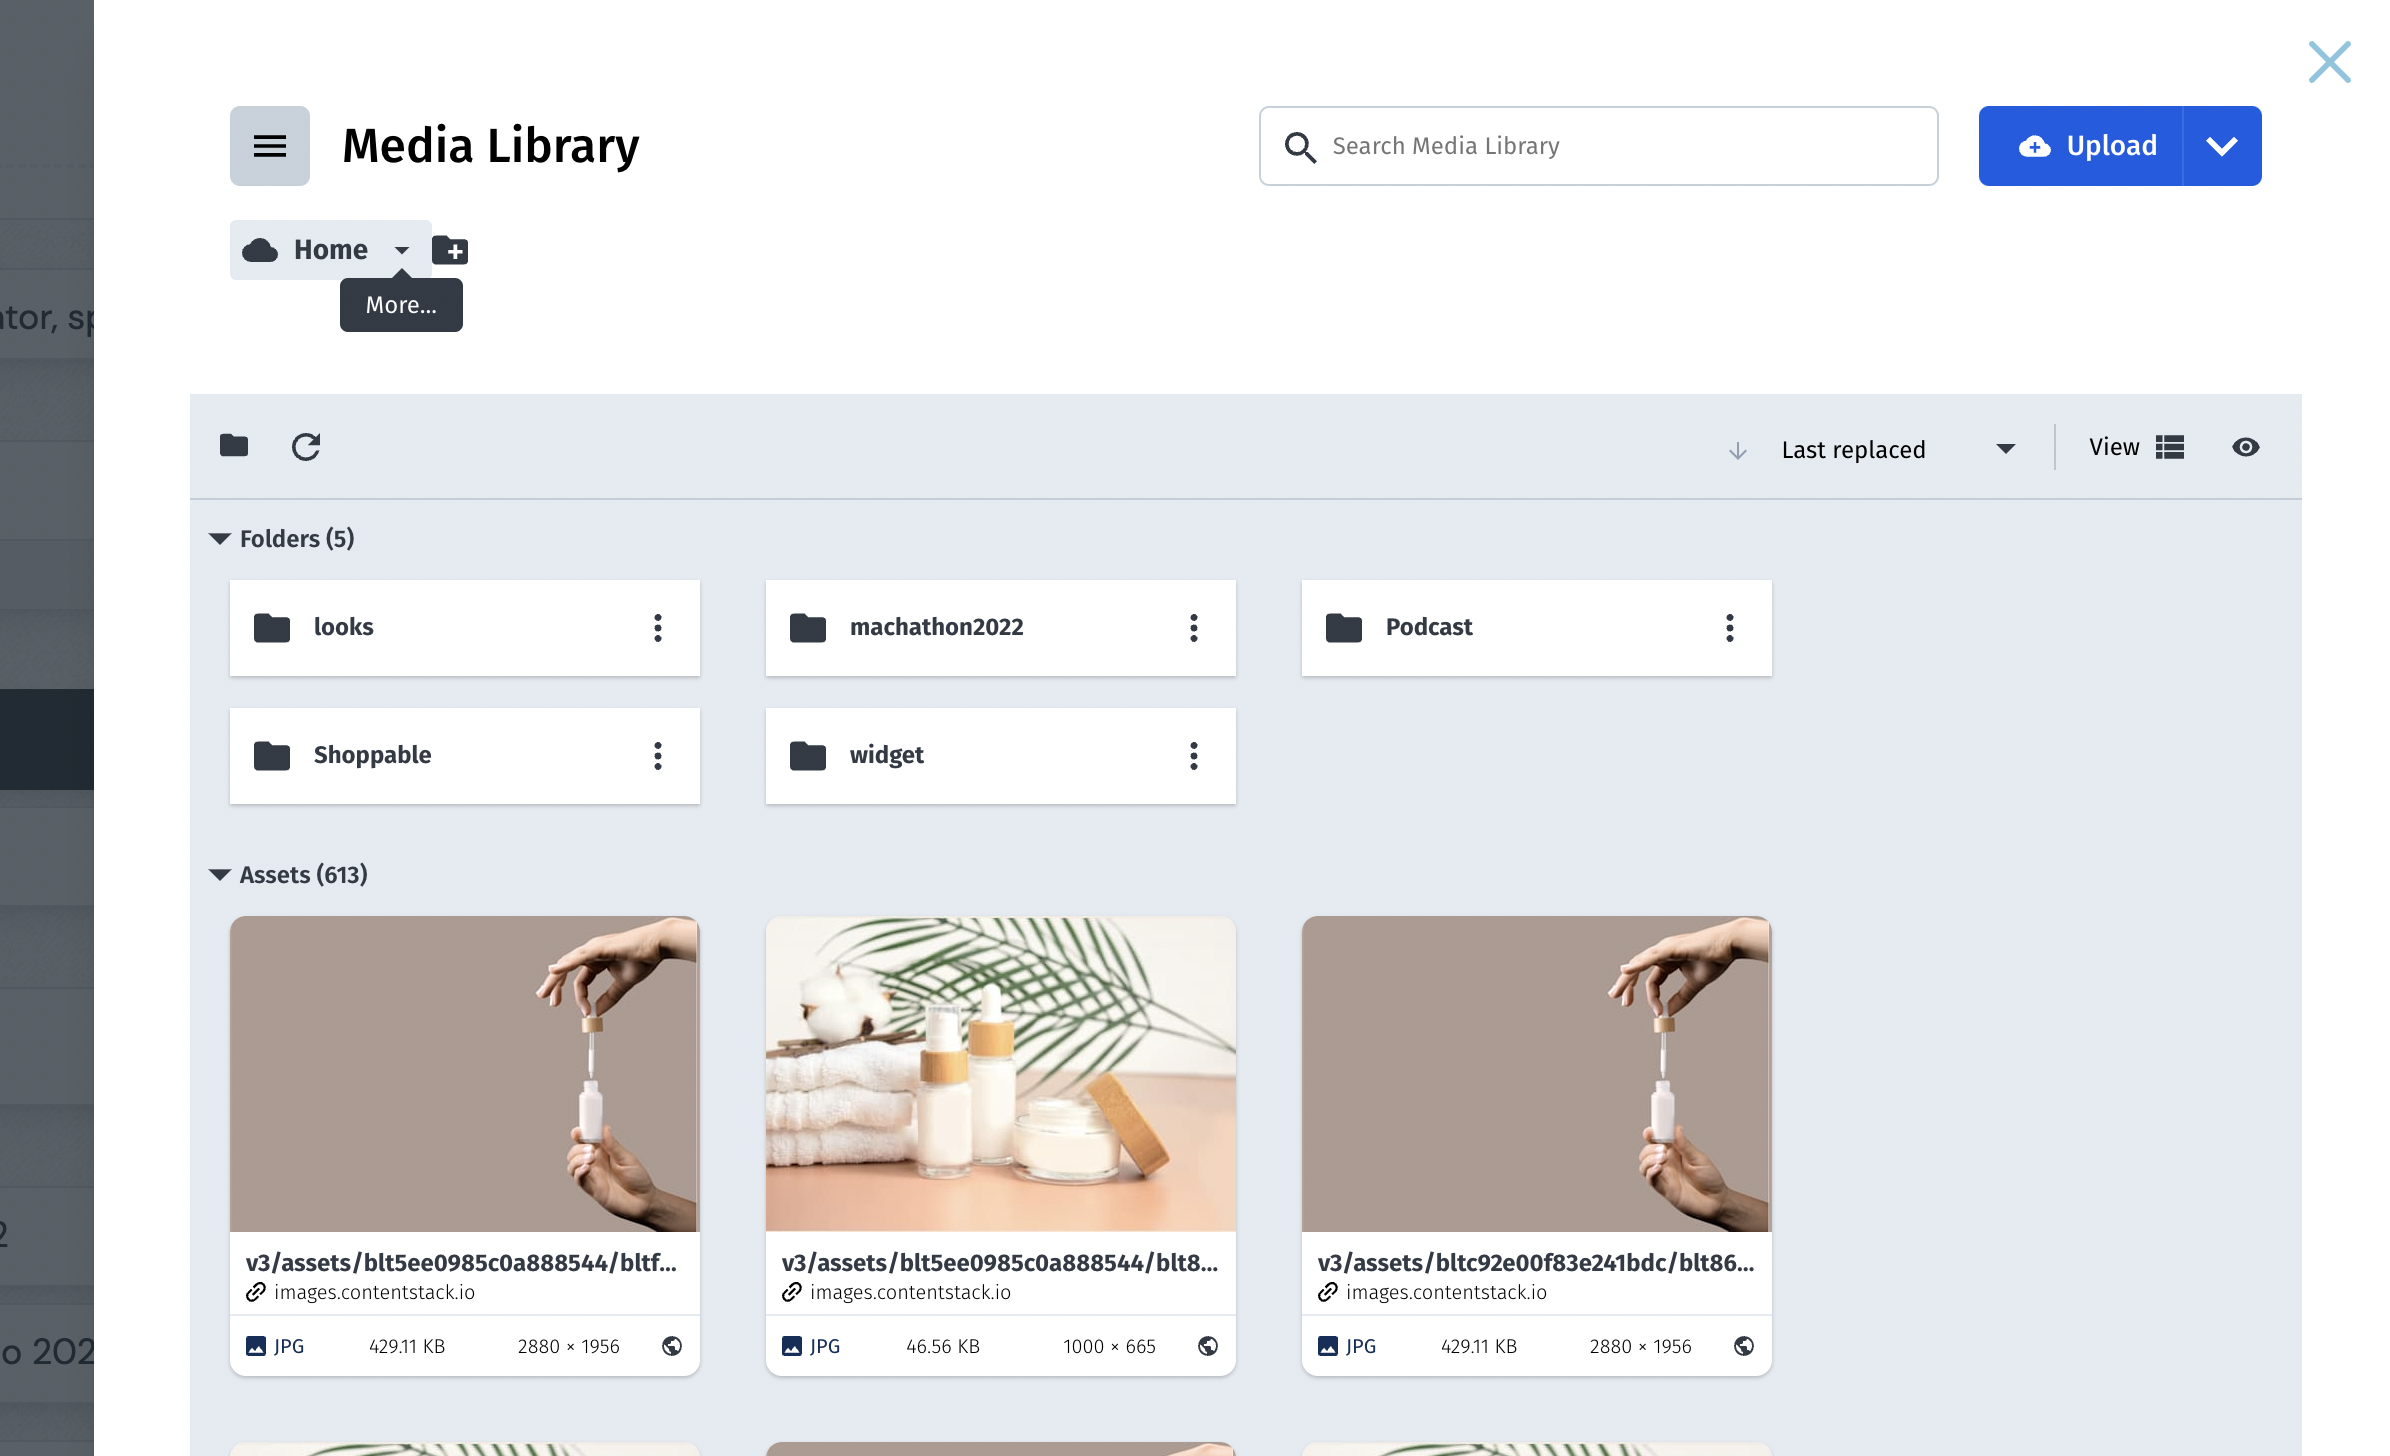
Your shiny new image has been added to the composition. Hit save to make sure your image is persistent.
Step 3: Wire up your app
tip
Before wiring up your app, please familiarize yourself with the concept of enhancers. This chapter will walk you through adding enhancers to your web application.
Pre-requisites
Ensure you already have a web application wired to Canvas with Uniform API key and Project Id in the env vars.
If you don't have the Canvas enabled app up and running yet, please go through one this tutorials:
Adding the Cloudinary enhancer
info
This tutorial will use a Next.js application as an example, but the same concepts apply to any other JavaScript framework.
Fetch a composition
The code below is one of the ways to fetch a composition with Uniform canvas. Note that you might fetch your ENV variables differently.
import { CanvasClient, enhance } from '@uniformdev/canvas';

export async function getStaticProps(context) {
  const canvasClient = new CanvasClient({
    apiKey: process.env.UNIFORM_API_KEY,
    projectId: process.env.UNIFORM_PROJECT_ID,
  });

  const slug = context?.params?.slug ?? '/';
  const { composition } = await canvasClient.getCompositionBySlug({ slug });

  return {
    props: {
      composition,
    },
  };
}
Create a Cloudinary enhancer
Let's enhance the previous code by adding a custom enhancer that enriches the initial Cloudinary JSON object coming from the Uniform Canvas API.
First, install the Cloudinary data enhancer by running
npm install @uniformdev/canvas-cloudinary.Activate cloudinaryEnhancer where you fetch Canvas compositions. If you use Next.js, typically, that's done within your page files, for example:
/pages/[slug].jsimport { CanvasClient, enhance } from '@uniformdev/canvas';
import { CLOUDINARY_PARAMETER_TYPES, cloudinaryEnhancer } from '@uniformdev/canvas-cloudinary';
export async function getStaticProps(context) {
const canvasClient = new CanvasClient({
apiKey: process.env.UNIFORM_API_KEY,
projectId: process.env.UNIFORM_PROJECT_ID,
});
const slug = context?.params?.slug ?? '/';
const { composition } = await canvasClient.getCompositionBySlug({ slug });
// register Cloudinary enhancer and call the enhance function
await enhance({
composition,
enhancers: new EnhancerBuilder().parameterType(CLOUDINARY_PARAMETER_TYPES, cloudinaryEnhancer);
context: {},
});
return {
props: {
composition,
},
};
}