Netlify Edge Functions
Why this is important
When customers look to achieve fast performance, elastic scale, enhanced security, and infrastructure efficiency of their web properties, they turn to Jamstack. The static websites provide this promise. Where static sites typically fail to deliver is when you need to alter the web experience of each individual visitor. The marketing users want to keep personalization and A/B testing capabilities, so they can continuously optimize the web experience and increase the conversions.
While there are client-side tools that work on the DOM-level, this approach predates the modern virtual DOM-based front-end libraries and frameworks, like React and Vue. This causes constant conflict for DOM (HTML), which results in flicker, content swaps, poor UX for your visitors in general, as well as a negative impact on Core Web Vitals.
This is when the digital architects turn back to the server-side rendering. Depending on the specific parameters of the solution, this may set you back in terms of infrastructure overhead and even performance. Going back from the Jamstack paradigm to more traditional server-side rendering can come with some trade-offs.
This is where the edge-side processing of static sites comes to the rescue. Powered by the edge compute capability of a Content Delivery Network, this functionality allows to continue generating static pages at build-time (Jamstack) but also provides the ability to modify page contents before it reaches the users' browser.
This allows keeping the best of both worlds: stellar performance, scale, and security characteristics that Jamstack is great for, and run personalization and A/B testing.
Enter Netlify Edge Functions
Netlify recently released Edge Functions, an innovative edge logic layer powered by Deno. At this time, the functionality is in the public beta.
To learn more about Netlify Edge Functions, visit this official documentation.
Experimental feature
Netlify warns this is still an experimental capability as of Jun 29th, 2022.
Uniform and Netlify Edge Functions
Uniform Context comes with the edge-side SDK and plugs natively into Netlify Edge Functions allowing business users to manage both personalization and A/B testing without developer involvement. The personalization and A/B testing runs in front of the statically generated pages, outside of the browser, which conquers the flicker, content swaps and Cumulative Layout Shift issues. This capability is what we will be referring to as Edge-side personalization.
To learn more about Edge-side vs. Server-side personalization, check out this doc.
Blazing fast page load without flicker
This is a real webpagetest.org test showing 0.5 second page load without any UX issues:
Quick demo
Open this pre-deployed demo site to experience Uniform personalization running on Netlify Edge Functions, check it out:

Experience these scenarios
- Open the For Developers page and go back home. Notice the hero changed to show a different message.
- Do a full page reload. Notice the page is stable, and no flicker!
- Now, try disabling JavaScript in your browser dev tools. Refresh the page. Notice the personalization still occurs? This is edge-side execution in action.
- Re-enable JavaScript to continue with the demo.
- Click Forget me to reset the Uniform signal scores. Visit For marketers and return to the home page, notice a different variant. This is personalization based on behavior collected at the edge.
- Go to Registration and complete fake registration. Go back to home. Notice a different hero is shown. This is a cookie-based signal in action. Click Forget me to reset the Uniform signal scores.
- Now visit the Campaign page. Notice
?utm_campaign=unfrmconfis added to the URL and a different hero is shown? This is a query string-based signal in action.
Use cases
The following use cases are possible with Uniform Context + Netlify Edge Functions:
- GEO-based personalization based on Netlify Geo data.
Our Netlify integration extends your project with Netlify-specific quirks, allowing to create signals based on any Geo attribute Netlify provides. Read more about Netlify geo object here.
- Personalize on any data present on the HTTP request:
utm_campaignor any query string-based personalization- Cookie-based personalization
- Uniform A/B testing
- Personalization based on session context (user preferences, profile, shopping history, etc.).
- CDP-based personalization (or any API-based data context provider for that matter).
This will require fetching this data from the Edge Functions and supplying the values into Uniform Context quirks.
Getting started
Pre-requisites
- An account with Netlify.
- Access to Github.
- Node.js installed locally.
Step 1: Working locally
This sample app is using a "fake CMS", so it's easy to get started.
It's a sample app
This is a sample app geared towards this specific tutorial. It setup with the essentials only, therefore not recommended to be used as a foundation to build a production site.
Clone this repo:
git clone https://github.com/uniformdev/examples.gitcd examples/context-edge-netlifynpm installPrivate npm packages needed
This guide requires access to private Uniform npm packages, requiring an npm token issued by one of the Uniform representatives. Set the token as
NPM_TOKENenvironment variable (recommended), or replace the token reference in.npmrcfile in application root.- If you are an existing customer, please contact support.
- If you are evaluating Uniform, please contact us here.
npm run devto start a local dev server. This mode is running a standard Next.js development server. Make sure the site renders.In order to run Netlify Edge Functions locally, you would need to use Netlify CLI.
- Run
npm install netlify-cli -gto install.
- Run
Now Run
netlify dev. You will get a few prompts to enable Netlify Edge Functions, make sure to say "yes" to those questions.Once Netlify Dev starts, open
http://localhost:8888/?utm_campaign=unfrmconf, you are expected to see the personalized hero for "Call for papers".Now disable JavaScript in Chrome dev tools and reload the page. You should still see personalized hero without any JavaScript execution in the browser. That's essentially proving you are working within the edge-side mode!
Step 2: Deploy your app
In this example, we will use a quick approach when we run the deploy command from a local machine using Netlify CLI. If you are setting up Netlify via a git-based deployment using GUI, you would need to configure the NPM_TOKEN and build settings accodingly.
Make sure to add the
NPM_TOKENenvironment variable to be able to build private packages.The value is the npm token that one of our Uniform representatives provided you with.
Run
netlify deploy --build --dir .next --prodto build you app along with Netlify edge functions required to execute Uniform edge personalization.If you are deploying for the first time, this command will ask you to link this deployment to a Netlify site (existing or create a new). Complete the prompts according to your preferences.
During the build, you should be able to see similar log messages in console, which indicates the Edge Functions build was successful:
5:26:36 PM: ────────────────────────────────────────────────────────────────
5:26:36 PM: 5. Edge Functions bundling
5:26:36 PM: ────────────────────────────────────────────────────────────────
5:26:36 PM:
5:26:36 PM: Packaging Edge Functions from netlify/edge-functions directory:
5:26:36 PM: - context-middleware
5:26:40 PM:
5:26:40 PM: (Edge Functions bundling completed in 3.7s)
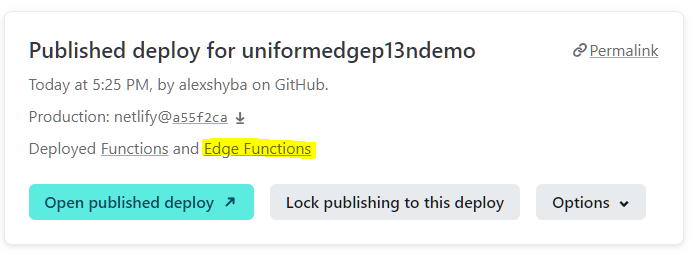
5:26:40 PM:If you open you latest deployment in Netlify dashboard, you should be able to see the link to the Edge Functions log:
Open up the front-end of the site and go through the same scenarios as before to test drive personalization.
- Try disabling the JS in your Browser dev tools to see personalization taking place on the Netlify side.
Success!
Congratulations, you have your edge-side personalizable site up and running on Netlify Edge Functions!
Next steps:
If you'd like to understand the internals more, proceed to the deep dive section below.
Optional deep dive
If you would like to reconstruct this whole setup from scratch, this section walks through all the moving pieces. You can use this section to review the sample app we cloned earlier. After going through this doc, you should be able to integrate this capability into your own web application.
Step 1: Get a Next.js app running
You would need a vanilla Next.js app instrumented to Uniform Context SDK basics. If you don't have one running yet, we recommend completing this tutorial here.
Step 2: Enable the edge-side mode
Follow the steps in this doc.
Don't forget
Make sure you set outputType="edge" on your <UniformContext />:
<UniformContext outputType="edge" ...>
  ...
</UniformContext>
Step 3: Add Uniform edge context SDK
npm install @uniformdev/context-edge-netlifyPrivate npm package
This package is private and requires an npm token issued by one of the Uniform representatives.
- If you are an existing customer, please contact support.
- If you are evaluating Uniform, please contact us here.
Copy
index.deno.jsfromnode_modules/@uniformdev/context-edge-netlify/dist/tolib/context.
Step 4: Add your Netlify Edge Function
Create a new file for your function called
context-middleware.ts, placed under your app's/netlify/edge-functionsfolder (needs to be created).Paste the following function code into your new function file:
- Ensure that the path to the context manifest is correct.
- Ensure that after
npm installyou have theindex.deno.jsfile underlib/contextfolder.
/netlify/edge-functions/context-middleware.ts// @ts-ignore
import type { Context } from 'netlify:edge';
import manifest from '../../lib/uniform/context-manifest.json' assert { type: 'json' };
// @ts-ignore
import {
createEdgeContext,
createUniformEdgeHandler,
buildNetlifyQuirks,
} from '../../lib/uniform/index.deno.js';
const IGNORED_PATHS = /\/.*\.(ico|png|jpg|jpeg|svg|css|js|json)(?:\?.*|$)$/g;
export default async (request: Request, netlifyContext: Context) => {
// ignoring requests that are not pages
if (request.method.toUpperCase() !== 'GET' || request.url.match(IGNORED_PATHS)) {
return await netlifyContext.next({ sendConditionalRequest: true });
}
const context = createEdgeContext({
manifest: manifest,
request,
});
const originResponse = await netlifyContext.next();
const handler = createUniformEdgeHandler();
const { processed, response } = await handler({
context,
request,
response: originResponse,
quirks: buildNetlifyQuirks(netlifyContext),
});
// logging, feel free to remove it
if (processed) {
console.log('Edge Function:', { url: request.url, processed });
}
if (!processed) {
return response;
}
return new Response(response.body, {
...response,
headers: {
...response.headers,
'Cache-Control': 'no-store, must-revalidate',
Expires: '0',
},
});
};Modify your
netlify.tomlby adding this entry at the bottom:[[edge_functions]]
path = "/*"
function = "context-middleware"
That's it! You made it to the end of this walkthrough.