Custom element configuration
Uniform extend your Kontent project functionality with ability to:
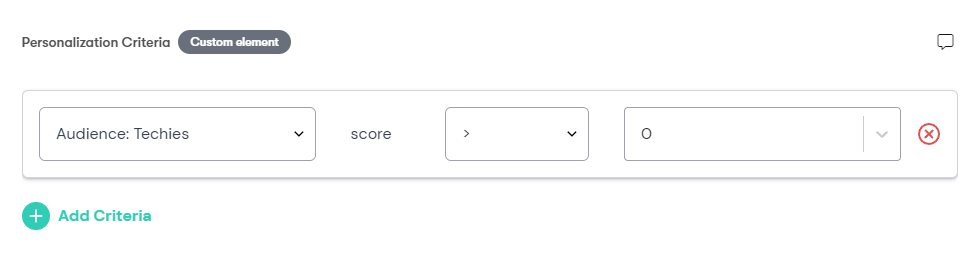
Configure personalization within you content by setting a Personalization Criteria, allowing to display content relevant to your audience based on the visitor context. For example, here is how you configure criteria stating that this content is relevant to audience "Techies":
Tag your content (pages or components) in Kontent with Enrichment Tags, which allows to implement behavioral profiling which can be used for personalization and tracking.
While both capabilities can be enabled independently via Kontent custom elments, the Personalization Criteria is typically the first one to enable, since without it you cannot configure personalization rules within Kontent.
Have you seen Uniform Canvas yet?
Uniform Canvas is a separate capability allows to manage the component-based composition of a page and faciliate the Personalization and A/B testing on top of content from Kontent. Once your page-level content is modeled with Canvas, activation of Personalization is one click away. If you use Canvas, you don't need to worry about adding the Personalization Criteria custom element, as all the personalizaiton criteria will be managed in Canvas. The Enrichment Tag can be used even if you use Canvas to tag the content that hasn't been modeled in Canvas yet.
Prerequisites
- Have your Uniform Project Id and API Key handy. If you don't have one, visit this section to learn how to acquire a new API key for your Uniform project.
- Sufficient access to your Kontent project, allowing to create new custom elements to content types.
Add Personalization Criteria custom element
This custom element will store the personalization criteria data, which will then be interpreted by Uniform Context SDK that will need to be baked into your JS application. This personalization criteria data will be stored next to your content in Kontent, just like any other content defined on your content types.
Here is the process of adding a new custom element.
Locate the content type where you'd like to add the ability to define the personalization criteria. If you don't have one, create a new content type called "Hero".
While the decision which content type to add the custom element to is completely solution specific, the decision is quite simple actually, and is driven by your business requirements. You need to ask yourself: which content do I need to personalize? Typially, this is component-level content or blocks, like Heros, Marketing CTAs.
Drag the Custom element to your content group:
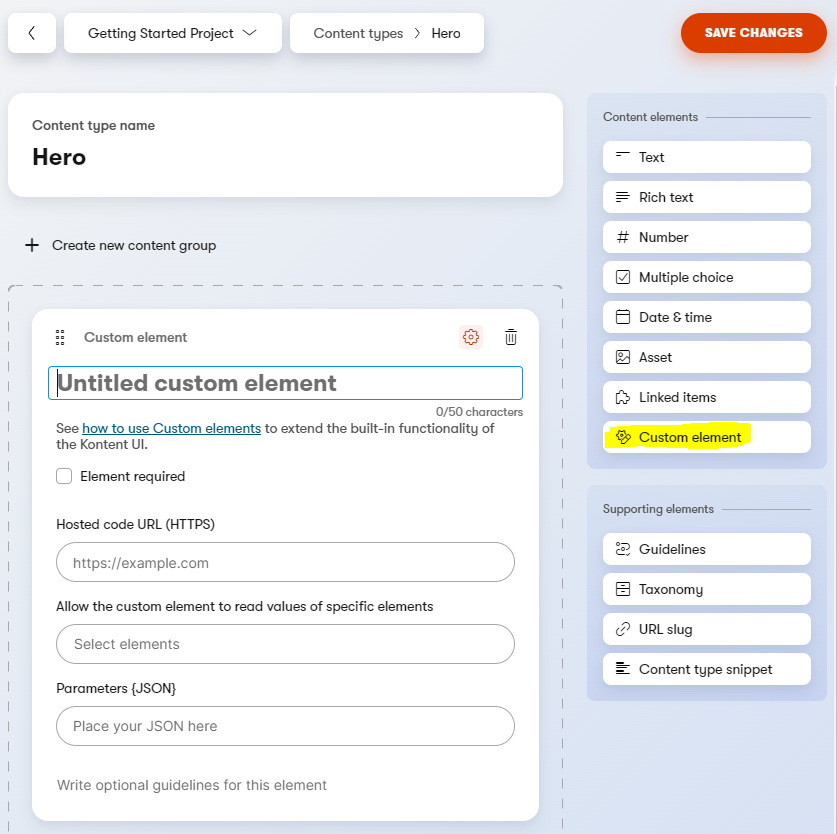
Give this element a name:
Personalization Criteria.Important
While the name can be anything you want, the name of the custom elment is important to remember, as it will seed the name of this element in code, which we will be using when reading the value when wiring up our web application.
For the Hosted URL, specify
https://uniform-context-kontent.netlify.app/personalization-criteria.For the Parameters {JSON}, specify the following JSON (replace the
apiKeyandprojectIdwith Uniform API key and Project ID created earlier, leaveapiHostset tohttps://uniform.app):{
"apiKey": "uf-YOUR-READ-ONLY-API-KEY-WITH-CONTEXT-PERMISSIONS",
"projectId": "ad83c986-8a95-4757-be6a-fd1191dd681q",
"apiHost": "https://uniform.app"
}What if I don't have an API key?
Follow this doc to create one. You only need the read-only permissions to connect your custom element to your Uniform project.
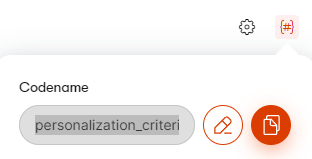
Verify that the resulting configuration of this custom element, it should look like this:

Click "Save Changes" to apply the changes.
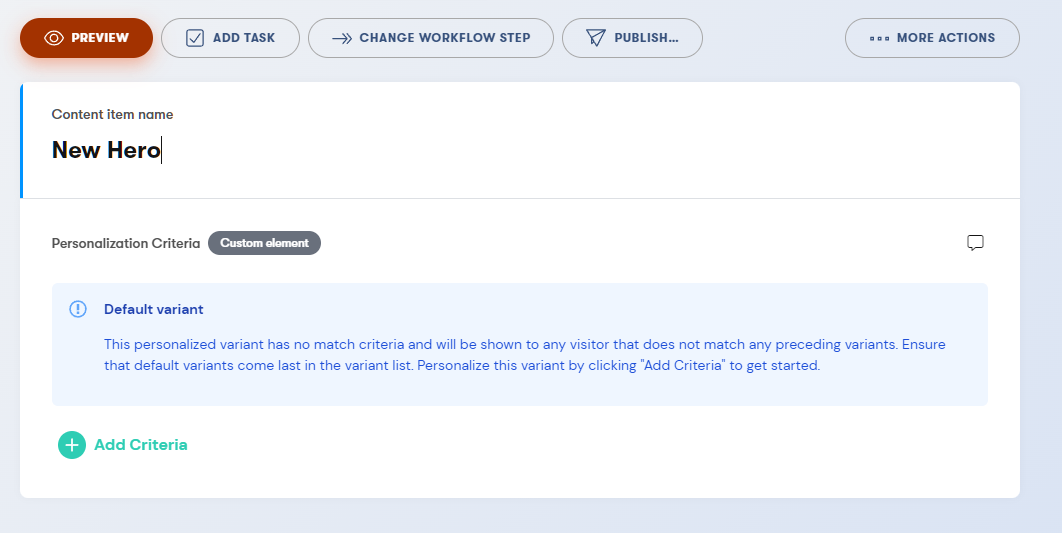
Now create a new content item from this content type to see the custom element in action.
Since there is no value yet, the custom element will display "Default variant":
Click "Add Criteria", you should be able to see all available options from your Uniform project (Signals, Enrichments, Intents and Audiences), allowing you to forumate a personalization criteria for this particular content item which evaluates to
true. In this particular example, this Hero content item will be displayed only when Signal "Call for papers" score is greater or equal to 50: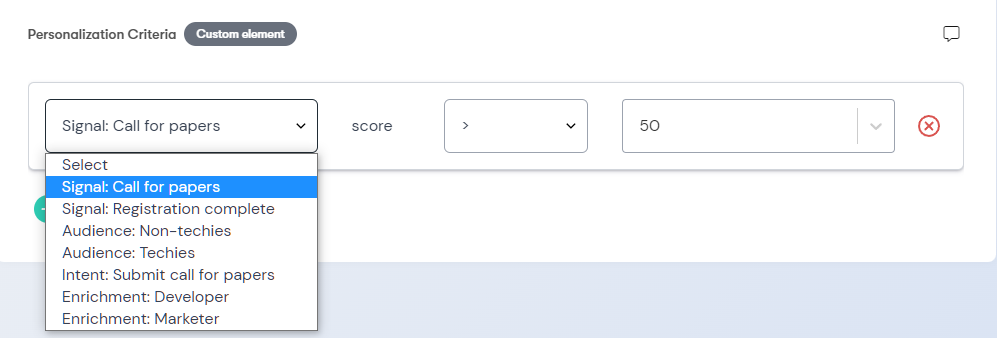
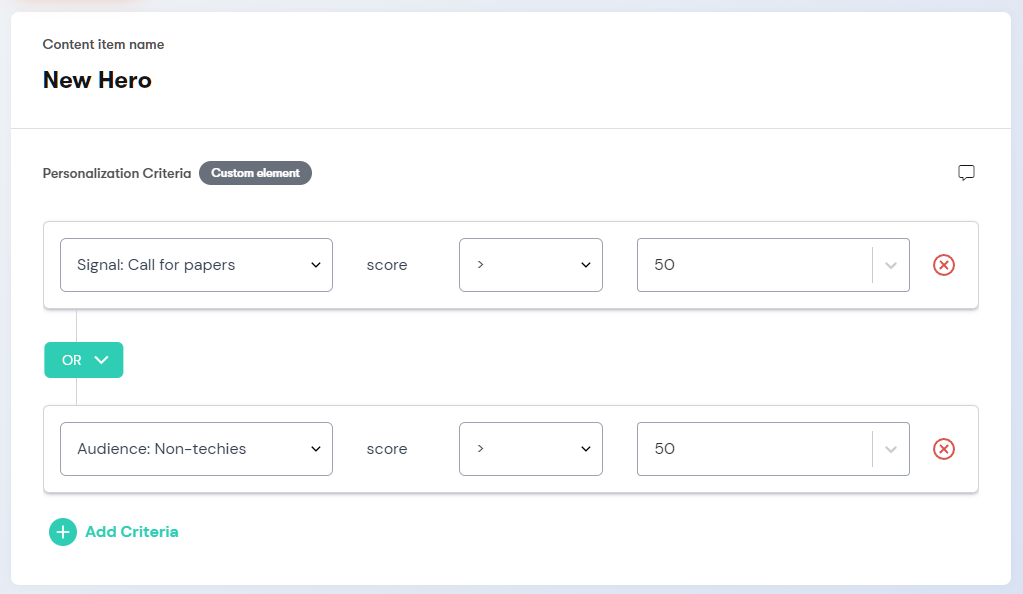
After you make the change, Kontent will save this criteria automatically. You can start with a simple personalization criteria, or add more complex expressions:
Success!
Congrats, you finished your first custom element configuration. You are now able to store the personalization criteria on your content within your Kontent project.
Next steps:
- Consider adding Enrichment Tagging. It's optional, but it will enable you to start behavioral profiling your content.
- Jump straight into the part where you wire up your JS web application with Uniform Context SDK, allowing to interpret both Personalization Criteria data and Enrichment Tags if those are setup.
Add Enrichment Tags custom element
This is an optional but useful capability, allowing to tag your content items with Uniform Enrichments, which will enable Uniform Tracker to perform content profiling, allowing you to personalize based on the kinds of content the visitors consume.
Similar to the Personalization Criteria step above, the process of activating this feature requires adding a custom element will store the enrichment tag data, which will then be interpreted by Uniform Context SDK that will need to be baked into your JS application.
This enrichment tag data will be stored next to your content in Kontent, just like any other content defined on your content types.
Let's add a new custom element:
Locate the content type where you'd like to add the ability to define the enrichment tags. If you don't have one, create a new content type called "Page".
While the decision which content type to add the custom element to is completely solution specific, the decision is quite simple actually, and is driven by your business requirements. Typially, enrichment tags are placed on the page-level content types (Landing Page, Page, etc.), but can also be placed on the component-level content, depending on your architecture.
Drag the Custom element to your content group:
Give this element a name:
Enrichment Tags.Important
While the name can be anything you want, the name of the custom elment is important to remember, as it will seed the name of this element in code, which we will be using when reading the value when wiring up our web application.
For the Hosted URL, specify
https://uniform-context-kontent.netlify.app/enrichment-tag.For the Parameters {JSON}, specify the following JSON (replace the
apiKeyandprojectIdwith Uniform API key and Project ID created earlier, leaveapiHostset tohttps://uniform.app):{
"apiKey": "uf-YOUR-READ-ONLY-API-KEY-WITH-CONTEXT-PERMISSIONS",
"projectId": "ad83c986-8a95-4757-be6a-fd1191dd681q",
"apiHost": "https://uniform.app"
}What if I don't have an API key?
Follow this doc to create one. You only need the read-only permissions to connect your custom element to your Uniform project.
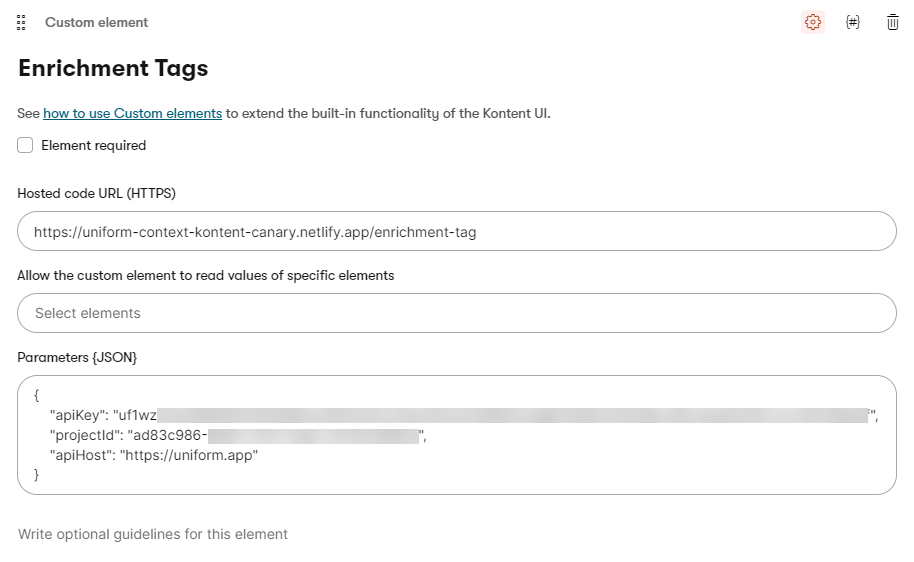
Verify that the resulting configuration of this custom element, it should look like this:
Click "Save Changes" to apply the changes.
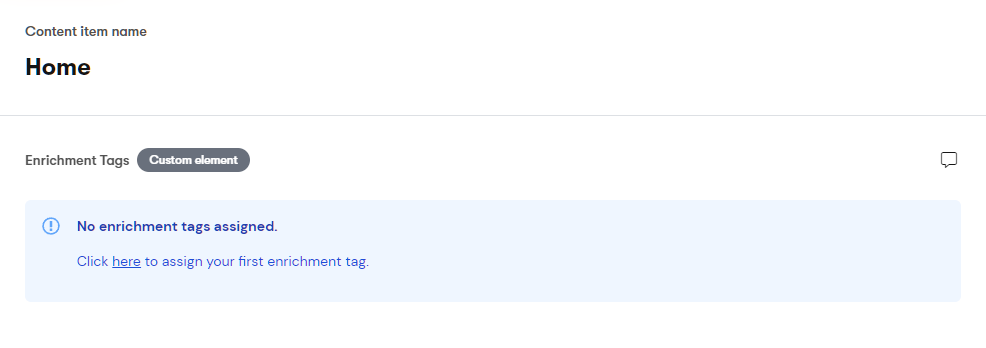
Now create a new content item from this content type to see the custom element in action.
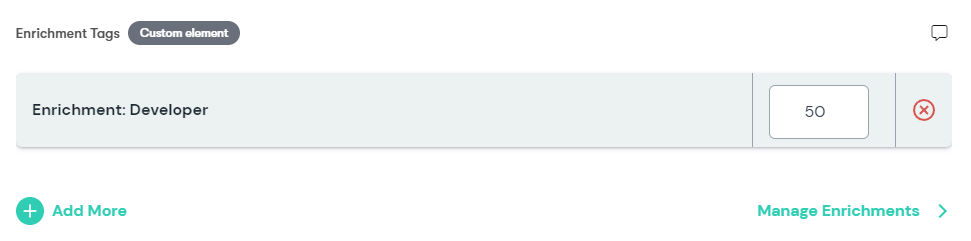
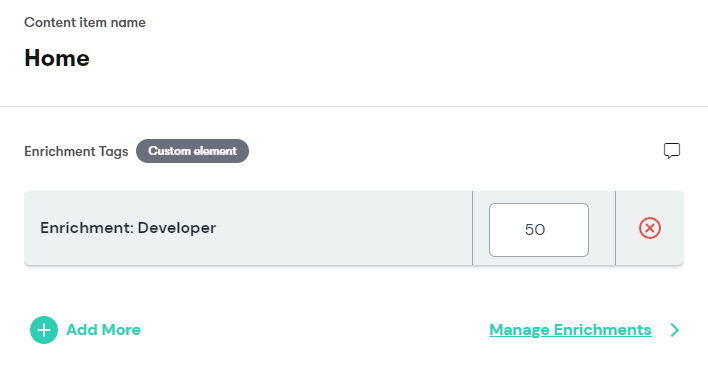
If you have any enrichments within your Uniform project, you should be able to see them in the list:
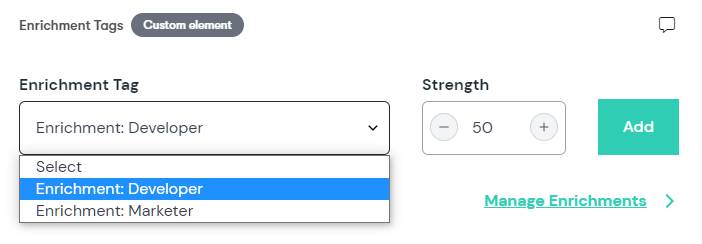
Select one or many enrichments and set the desired score, which may vary based on your personalization strategy and the nature of content you are tagging.
Success!
Congrats, now your Kontent project is fully enabled with Uniform Context. Next step is to wire up Uniform Context SDK to your web application, which will not only enable tracking behavior with Uniform tracker, leverage the Enrichment Tags, but also perform personalization based in the Personalization Criteria data stored along with your content in Kontent.